|
|
|
|
|
|
Classic Bikes
Custom Bikes
Individual
Racing Bikes AJP
AJS
Aprilia
Ariel
Avinton / Wakan
Bajaj
Benelli
Beta
Bimota
BMW
Brough Superior
BRP Cam-Am
BSA
Buell / EBR
Bultaco
Cagiva
Campagna
CCM
CF Moto
Combat Motors
Derbi
Deus
Ducati
Excelsior
GASGAS
Ghezzi Brian
Gilera
GIMA
Harley Davidson
Hero
Highland
Honda
Horex
Husaberg
Husqvarna
Hyosung
Indian
Jawa
Kawasaki
KTM
KYMCO
Laverda
Lazareth
Magni
Maico
Mash
Matchless
Mondial
Moto Guzzi
Moto Morini
MV Agusta
MZ / MuZ
NCR
Norton
NSU
Paton
Peugeot
Piaggio
Revival Cycles
Roland Sands
Royal Enfield
Sachs
Sherco
Sunbeam
Suzuki
SWM
SYM
Triumph
TVS
Ural
Velocette
Vespa
Victory
Vincent
VOR
Voxan
Vyrus
Walt Siegl
Walz
Wrenchmonkees
Wunderlich
XTR / Radical
Yamaha
Zero
Video
Technical
Complete Manufacturer List
|
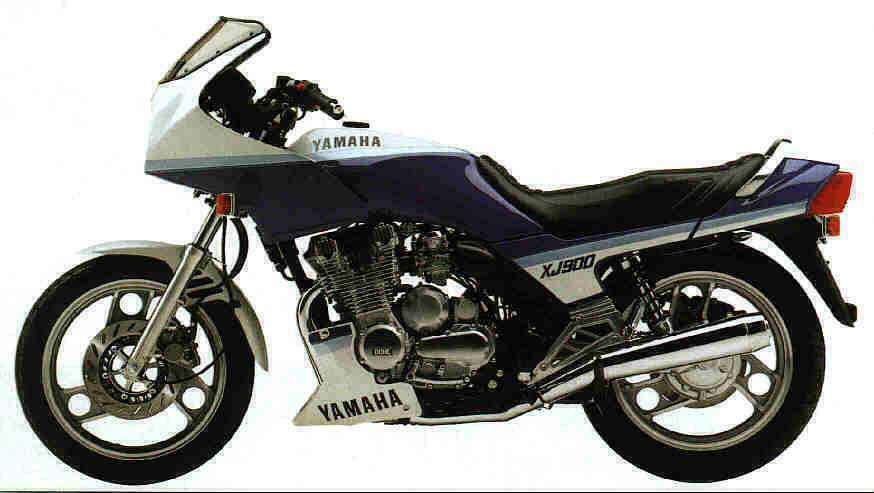
Yamaha XJ 900F
Sensible bikes are small, and
motorcycles never have long production runs. As generalisations, it's fair
to say that these are mostly true, but then along comes Yamaha's XJ900 to be
the exception to prove the rule -whatever that means. For this air cooled,
transverse four cylinder machine has been churning out of the Hammamatsu
factory for almost exactly a decade,now, The generous 4.8 gallon fuel tank and 45 to 55 mpg consumption allow two hundred miles to be covered before the reserve tap even needs to be cocked, and the roomy riding position doesn't make this a particular feat of endurance, though the forward slope of the seat is less than ideal. Low down torque is excellent, enough for the bike to comfortably pull from two thousand rpm in top gear, making for a relaxed, long legged feel. In fact revving it is nothing like as satisfactory anyway, mainly because the motor becomes harsh and vibratory when spun much above six thousand. But another feature which
appeals to Once the tank is off, it's worth
smearing a little grease on the two locating rubbers at the front, to make
life a lot easier when it comes to replacing it. The fairing doesn't have to
come off, though many people assume otherwise -instead remove the two 6 mm
bolts at the back of it, near the engine,- as there's enough flexibility in
the panels for them to be bent out of the way when necessary. Dave Sterry at
Hamil-tons in Streatham, who kindly did the necessary to this particular XJ
for us, then prefers Working down the engine, the spark plugs themselves are very easily taken out (with or without the fuel tank in place) as they're angled towards the outside of the engine. The leads are not only numbered one to four from left to right, but colour coded as well in case the numbers wear off, so there's not much excuse for putting them back wrongly. In fact, the plugs last well, as long as fifteen thousand miles if the bike's not used too hard. Next, if the engine's cold, the valve clearances can be adjusted. The cam cover is held on by eight bolts with 10 mm heads and 6 mm threads, with thick rubber washers to seal them. All are very easy to get at, and all are the same. Once they're out, the cover itself lifts off and will come quite easily away out of the left hand side of the engine, exposing the eight valves and their shimmed clearance system. The shims are on top of the
valve buckets, so the cams themselves don't need to be disturbed. If you
want to play safe, undo the left hand crankshaft end cover, so the timing
marks can be seen, and align the T' scribe with the line on either side of
the ignition pickups. Two of the cylinders will be at top dead centre, and
one of those in its compression stroke, when the cam lobes will be facing
away from the valves. That's the cylinder to work on first, so check with a
feeler guage that the inlet valve clearance is between 0.11 and 0.15 mm, and
the exhaust between 0.16 and 0.20 mm. If one is outside the tolerance,
you'll need to replace the shim with a fatter or thinner one to bring it
back (usually you'll be after a thinner shim, as the gaps tend to close up
in use). If you're not confident about levering the valve down, clear of the
cam, with whatever you have lying around your shed, you'll need the special Definitely worth noting. Anyway, the shim can now be lifted out with the dextrous use of pliers and fine screwdriver, and hopefully its thickness will be inscribed on the back. If not, it was fitted the wrong way round and this wore off, so you'll need (...to get a dealer...) to measure it with a micrometer. Then the size of the new shim can be calculated. Once all the needy valves are seen to (usually only one or two at each service) the cam cover can be replaced. The rubber gasket will still be sitting snugly in its groove in the cover, and doesn't need to be replaced or assisted with any gasket cement, though it's worth cleaning up the rubber washers on the cover bolts, as with even a small piece of grit, they'll start to weep oil. Replace the timing cover, too. Now the enigne can be started and fully warmed so the carbs can be balanced. This is quite conventional, apart from the fact that a special tool is needed again to blank off the YICS valves. These are passages within the cylinder head linking the inlet tracts and which have a significant effect in boosting the low and mid-range power of the motor, but do interfere with carb balancing. Remove the bolt in the left side of the cylinder block, insert the special toll and crimp over the end - the passages are now suitably blanked off, and the vacuum gauge pipes can be connected to the brass stubs on top of the inlet tracts. On cylinders one, two and four these normally have rubber caps on, while the third cylinder's is connected to the fuel tap vacuum switch, but note that on older bikes the rubber hardens and cracks, so that air can leak into the inlets and upset the carburation. Replace them with new if you're in doubt. If you're using the fuel tank remotely, you'll have to set the tap to the 'Prime' position, or there'll be zero flow, but Dave Sterry uses an old oil bottle which holds enough gas for the balancing operation. The recommended method is to balance cylinders three and four to each other, then one and two to each other, and finally equalise the two pairs of cylinders with the central butterfly adjuster. If you can get all the carbs to read within 1 cm of mercury of each other (the absolute value is unimportant, unless it's obviously absurd and needs investigating) that's ideal, but 2 cm is acceptable. The carburettor air mixture screws are located on tops of the bodies, just to the engine side of the diaphragm housings, and are covered by rubber plugs. These don't normally need attention until the engine's covered quite a high mileage, but do ensure the plugs are securely in place, as otherwise water gets to the mixture screws and they seize up - the only cure when they do need to be moved is to drill them out, and that often doesn't work.
Under the left sidepanel (which
should already be off...) is the air filter housing, though you'll have to
unclip the toolkit holder before removing the four Phillips screws that hold
the cover on. The filter itself now comes out easily enough, but as it's
paper will have to be renewed rather than cleaned, and at about seventeen
pounds a time isn't cheap. On the other hand, even at something like five
thousand miles old it can affect fuel consumption noticeably, so don't leave
it too long - it's a false economy. A K& N washable airbox filter is
available for the XJ9, so if you're keeping the bike for a while, is a good
investment. Meanwhile, make sure the lip in the edge of the filter (on each
side) engages properly with the slots in the housing and cover, or again the
carburation will be upset by airleaks. On the other side of the bike is the
battery, which is very visible so checking the level isn't a chore. Source Witch Motorcycle 1993 
|
|
|
Any corrections or more information on these motorcycles will be kindly appreciated. |