.

Suspension Adjustment

.  

A bike's suspension is designed primarily to absorb the imperfections in the roads, and ensure that tyres keep contact with the roads. Most bikes suspension are based on a spring like you would find in a pen, mattress or trampoline but much stronger. To stop the spring from bouncing the tyre like a yoyo; the rate the spring moves up and down is controlled by “dampers”.

Dampers are “like oil filled bicycle pumps”. The pump will move faster or slower depending on the size of the hole the oil is being pumped through and the thickness of the oil. All bikes have both a spring and dampers. My bike has the spring on the outside of the damper on the rear wheel (called rear shock) but the front wheel suspension has the springs within the dampers hence you cannot see them. They are called the front forks.

The suspension for the front wheel is independent from the back wheel and can react differently to road and riding conditions.


Most sportbike makers understand that many riders find adjusting the suspension daunting and have taken two big steps to help out. One, the baseline settings outlined in the owners' manual are truly a good place to start. If you've just bought your bike or have lent it to a tinkering-minded friend, take a moment to reset all the adjusters to the factory "zero" settings before you do anything else.

Two, there's seldom enough range of adjustment to wholly screw up the motorcycle. Yes, it'll feel weird with the adjusters set wrong, but the bike won't be dangerous.


There are two main terms used to describe damping: compression and rebound. Compression damping assists the spring in resisting bumps and loads placed on the motorcycle, which is manifested in upward wheel motion. This kind of damping does not add spring rate or make the bike carry a bigger load; it merely changes the rate at which the wheel is allowed to travel upward relative to the chassis. Rebound is the opposite. After the wheel has hit a bump, the spring tries to force the suspension and wheel back toward the ground. As you might guess, rebound damping controls the rate at which the wheel is allowed to extend.
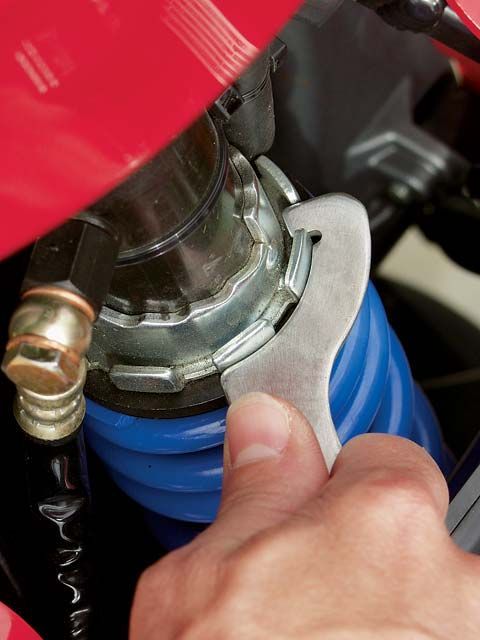
Bumps come in all shapes and sizes, so the suspension needs different damping rates at different times. When you twiddle an adjuster, you are controlling only the low-speed damping--that is, the control exerted inside the shock or fork over large, rolling kinds of bumps, or during braking and acceleration. Except for a few high-end shocks, you do not have any control over high-speed damping, which comes into play when the tires ride over closely spaced, rippled bumps. Remember, it's the speed of the suspension component we're talking about here, not the velocity the bike is traveling over the ground.


Shock Rebound
On shocks, the typical location for the rebound adjuster is on the shaft at the bottom of the shock. Increase the rebound damping by turning the adjuster clockwise looking at the bottom of the shock. Normally, the set point is fully in. Gently wind the adjuster all the way up until it just stops; do not force it. Begin turning it back counterclockwise and count the clicks; the first position (all the way in) does not count as a click. Some shocks have screw-type adjusters that are similar to the common compression adjusters. (See the section on compression-damping adjustment for the details.) On the fork, the rebound adjuster is found on the fork caps.

SOFT: However if it is a long corner then your rear rebound will come into play mid-corner. If your rear wheel kicks up too quickly, it will unsettle the chassis of the bike making it “wallow” and “lurch” mid corner. A lot of people wrongly try to cure mid comer “wallowing” by increasing rear preload. This may "stiffen" the rear end but you may loose a bit of suspension travel. The cure is to increase (harden) rear rebound.

HARD: However if your rear suspension is too hard, your back wheel will not sit up quick enough. This will cause you the have the back end squatting causing a “nose up “ situation for longer. This may cause you to drift wide similar to the effects of soft compression. Also since the rear shock does not extend quick enough, you may get a feeling of vagueness or loss of traction.

Shock Compression
This is a Soqi shock, with a click-type compression adjuster adjacent to the integral reservoir. It controls low-speed compression damping only. To find the baseline, use a good flat-head screwdriver and run the adjuster all the way in clockwise. Gently, please. When it stops, turn the adjuster back (counterclockwise) the specified number of clicks. As with rebound adjusters, the compression side is often not linear. That is, you may be changing damping force by, say, half a percent per click near the maximum, or fully in settings, but probably aren't making a quarter or even an eighth of that difference as the adjuster moves farther out.

SOFT: Let’s imagine that you are exiting a corner on your motorcycle, and the bike is leant over and you start to accelerate smartly. If the compression damping is too soft, you will get too much rear end “squatting” causing a “nose up” situation. This will cause your bike to drift wide on exit of the corner. This is not the same as a too much of front compression damping which causes the bike to drift wide on entry to the corner.

HARD: On the other hand if your rear compression damping is too hard, you will not get enough “squatting” and therefore may not get enough traction. This will cause a bit of rear wheel spin, or the rear wheel suddenly “kicking up”. You can imagine what can happen in extreme circumstances.

Fork Rebound
Most rebound adjusters for the fork are located on the fork cap. Note that Showa components often use stepless adjusters, indicated by the punch marks, one on the adjuster and another adjacent. To find the baseline settings, run the adjuster all the way clockwise and then turn out the specified amount. On most new Hondas, the baseline setting is found by turning the adjuster all the way in and then back out until the punch marks align, and then out a farther full turn. Useful increments for this type of fork are often a quarter or an eighth turn. Incidentally, the word "ten" on the label has nothing to do with the number of adjustments; it signifies "tension," which is just another way of describing rebound damping.

SOFT: If it rebounds too quickly in the corner your bike will sit up very quickly creating a longer wheel base. The front wheel “shooting” out also causes the bike to drift wide or a feeling of the front end “washing out” If this happens, increase (harden) your rebound to slow the rate the front wheel rebounds.


HARD: On the other hand if the rebound is too hard, when you let go of the brakes and on to the throttle in a corner, because the wheel is compressed for longer you will have a shorter wheel base for longer. This may cause the bike to feel wooden in the corner and turn too quickly. Soften her up.


Fork Compression
Front-end compression clickers are almost always found on the bottom of the fork leg. Showa 's compression setup is stepless (as with rebound), and the baseline setting is often all the way in plus one turn beyond the first alignment of the punch marks.

SOFT: If your compression is too soft, your bike will nose dive too quickly, then as you turn into the corner, the bike will collapse into it and you end up having to compensate.

HARD: On the other hand if you have too much front compression damping, do not get enough nose dive and the bike will be reluctant to turn and may drift wide on entry to the corner.

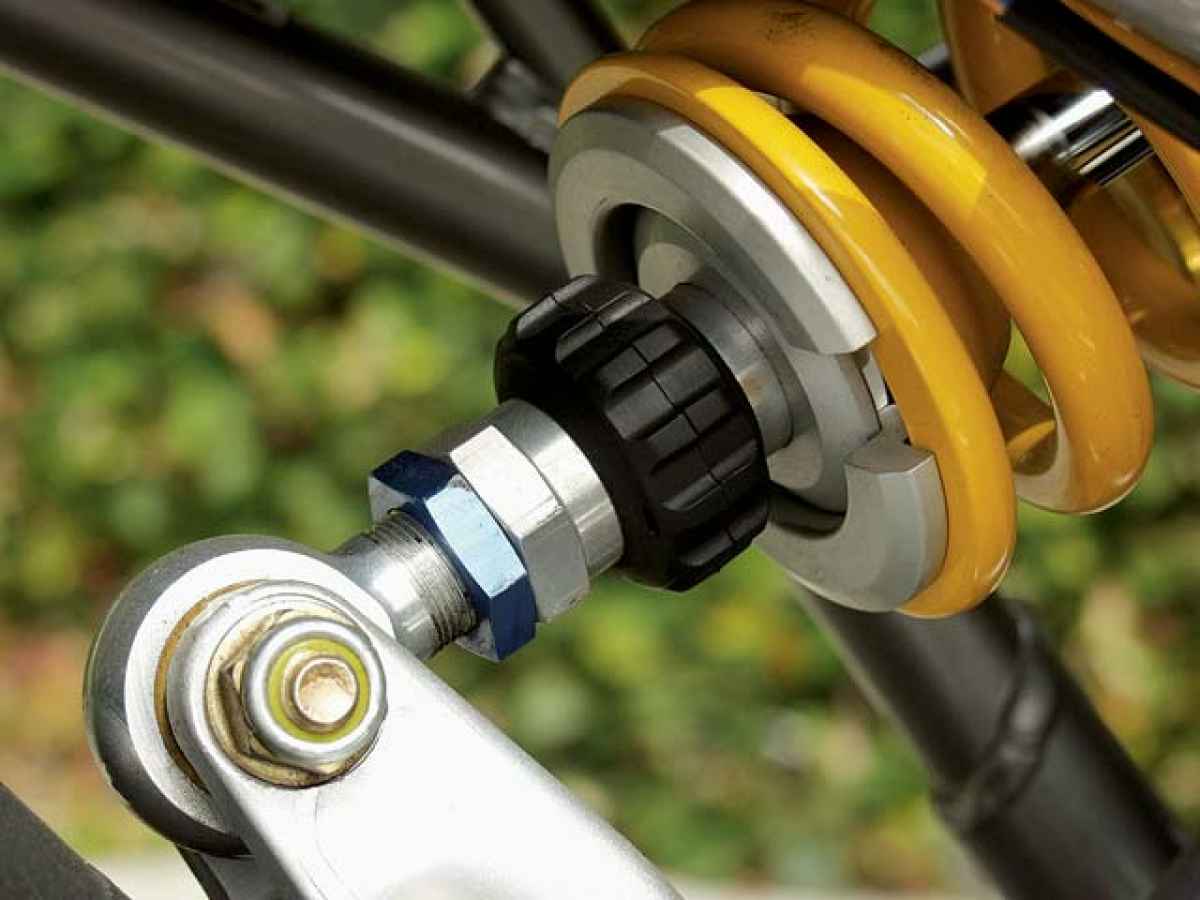
Bike setup

Rear Preload

Whatever your weight, when you sit on the bike, you want the bike to squat just a little bit (about 30mm) but not too much. You want to ensure that the bulk of your rear suspension travel is available for when you actually ride the bike as opposed to supporting your heavy frame. At the same time you should have a little bit of sag left. If the bike drops too much then increase preload and if you are very light and the bike barely moves under your weight, then soften the preload.
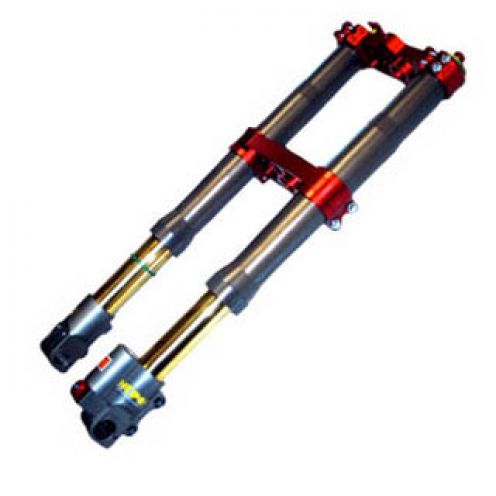
 

Front Preload

You want your bike to use as much front suspension "travel" as possible without "bottoming out" (no more travel) even in extreme conditions. So lets establish how much suspension travel you are currently using.

Wrap cable ties around the smooth part (stanchion) of front forks near the rubber seal to the forks. Ensure that it does not scratch the stanchion and it is not too tight as to damage the rubber seals.

With the cable ties in place ride your bike as normal using as many riding conditions (corners, braking, accelerating, wheelies and stopples) that you are likely to meet. Then increase or decrease your preload until the cable tie stops about 10 mm before “bottoming out”.

Reducing preload should give you more travel. If the forks bottoms out, reset the cable ties and increase preload until the cable tie stops around 10mm above the limit. You should always leave about 10mm travel for emergencies like slamming into uncharted potholes.


Follow this hyperlink to an excellent and very comprehensive article on how to set-up a bikes suspension: http://www.gostar-racing.com/club/motorcycle_suspension_set-up.htm